


by Leonardo R. Grabkowski Show
 http://flickr.com/photos/44124363889@N01 The crankshaft position sensor (also known as the crankshaft speed sensor) monitors engine RPM and assists the crankshaft to maintain proper timing and engine valve clearance. A faulty crankshaft position sensor can degrade idle quality, performance and engine efficiency; possibly causing damage to your internal engine components. Step 1Park the vehicle on level ground and engage the parking brake. Disconnect the negative battery cable for safety. Step 2Lift the vehicle using the floor jack. Locate the front jacking plate underneath the front of the vehicle, slightly to the right of the center. The plate is marked by an arrow. Place the jack stands on each side of the front, about 6 inches behind the front wheels. The side mounting parts are marked by an indentation along the bottom of the vehicle. Follow the same procedure to lift the rear. Step 3Use the socket wrench to remove the engine brush cover under the front of the engine. Remove the drive belt to make changing the sensor easier (optional). Step 4Remove the lower timing belt cover and the crankshaft pulley to access the crankshaft position sensor. Step 5Disconnect the electrical modules from the crankshaft position sensor, located next to the alternator. Take off the bolts with the socket wrench and remove the sensor. Step 6Place the new crankshaft position sensor in the exact location as the old one. Remount the bolts and connect the electrical modules. Reattach the crankshaft pulley and the lower timing belt cover. Put the drive belt back on if you removed it. Reattach the engine brush guard. Step 7Use the jack to lower the vehicle and remove the jack stands; starting with the rear. Reconnect the negative battery cable. References Things You'll Need
Warnings
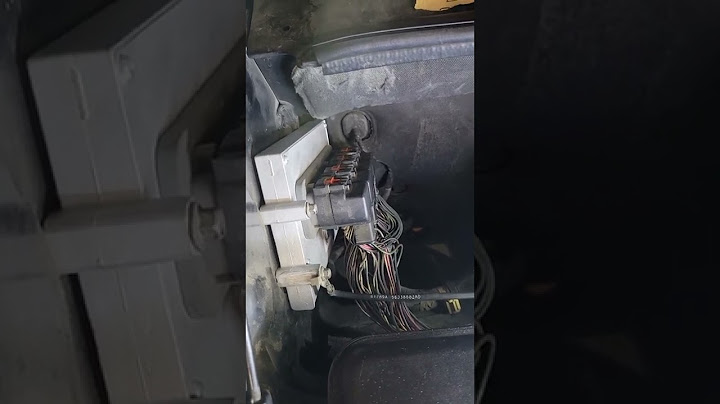
Writer Bio Leonardo R. Grabkowski has been writing professionally for more than four years. Grabkowski attended college in Oregon. He builds websites on the side and has a slight obsession with Drupal, Joomla and Wordpress. More ArticlesThe Honda Civic crankshaft position sensor is a part that’s located under your timing assembly and mounted to the engine next to the crankshaft snout. This sensor is primarily responsible for informing your Honda ECU of the current engine speed, or RPM. Without this sensor the ECU will not be able to operate the engine, and it may shut off unexpectedly. This sensor is also known as the Honda Civic Crankshaft speed fluctuation sensor as well, and should not be confused with the reference sensor inside your distributor. For information on converting your VTEC Honda to run on a distributorless ignition, check our handy guide here. Today we are looking at the OBDII trouble code P0335 in a 1999 Honda Civic EX and showing you how to replace or service your Honda Civic crankshaft position sensor. If your Civic is an automatic your 1.6 D16 engine could shut off at speed, leaving you without power steering or brake assist. If your Malfunction Indicator Lamp (MIL) is lit and showing a P0335 trouble code, you should stop driving your Civic immediately until you service it. The D16 crankshaft sensor is mounted near the crank gear and is designed to read the high and low spots. This provides the ECU with the proper signal required to orchestrate combustion. This EX crankshaft position sensor may be a different part number than the non VTEC versions of the Civic, but the replacement procedure is the same. This Honda Civic has a OBDII DTC trouble code of P0335 Honda’s specific language for this trouble code is Crank Sensor Malfunction. If you have a no start Civic or a Honda that’s not starting, try checking your crank shaft position sensor from the loom located behind the front timing cover. Where is my Honda Civic crank position sensor located?Like most SOHC Civic engines, the crank engine sensor is mounted to the front oil pump assembly. The sensor is mounted to read the teeth on your crankshaft gear. This hall effect sensor is how your Honda Civic ECU determines engine speed and it’s connected by way of a two pin connector that runs to the back of your engine. If you are planning to change your Honda Civic timing belt anytime soon, it might be a good idea to complete both jobs at the same time. Since replacing this Civic crankshaft position sensor is relatively easy once you have the timing assembly apart, you will not need more work to remove it. If you do need to raise your Civic to remove your Civic crankshaft sensor instead of test it, make sure to lift and secure your car carefully. When raising your Honda Civic, always use the proper safety measures and use extreme caution. Performing a Honda Civic crankshaft position sensor test is easy using a multimeter. If you don’t know what a multimeter is, check our article here for some tips. What is my 1.6 liter Honda Civic crankshaft position sensor part number? This Civic EX crankshaft sensor is part number 37500-P2F-A01 and it’s mounted to the front oil pump by a 10mm bolt. If your Civic is not starting and you have already tested your crankshaft sensor, skip ahead to the removal process of the guide. What is the Civic EK crankshaft fluctuation sensor wiring schematic? We’ll be testing your CKF in your Honda Civic EK by testing for power and ground, to make sure that it’s being powered. If you do have power and ground at the wires in question, chances are you have a break or intermittent wiring issue, or your sensor is failing. To test your CKF for power, disconnect the sensor and use your multimeter to probe PIN 2. PIN 2 is a yellow/black wire that powers your crank sensor in your Civic. Get into your Civic and insert the key into the ignition, and turn to the “ON” position. Touch the black lead of your multimeter to the negative probe of your battery and gently test the front of the ENGINE side of the harness. You should have power at this wire, which means that your main relay is properly powering your sensor. How Do I test my Honda Civic crankshaft fluctuation sensor? The testing procedure to measure the internal resistance of your hall effect Honda Civic CKF sensor is easy and straightforward. If your ignition is turned to the “ON” position, go ahead and remove the key now and turn your ignition off. Now using your multimeter, you are measuring PIN 1 and PIN 3 for internal resistance. Between the terminal 1 and terminal 3, you should have between 1.6 and 3.2 Ω. If your internal resistance checks out, move onto testing for continuity ground in the next segment of our DIY guide on testing your Honda Civic crankshaft position sensor. Testing your Civic CKF for continuity The next step in testing your crankshaft sensor is to check for continuity between your Civic’s chassis ground and the CKF sensor at both terminal 3 and terminal 1. Using your multimeter, you need to make sure that there’s continuity between PIN 1 and your chassis ground, and PIN 3 and the ground. My Civic crankshaft fluctuation sensor checks out okay but my check engine light won’t go away This is a common issue and usually related to damage in your ECU harness. To check this, you will be repeating the internal resistance test, but AT THE ECU this time. Using your multimeter, you will be measuring PIN 1 and PIN 11 on the 31 pin connector on your ECU. Checking the Crankshaft Position Sensor for Power Insert the key into the ignition and turn to the “ON” position, but do not start the vehicle. Unplug your D17 Honda Civic crankshaft position sensor connector. Use an extension wire from the negative post on your battery, and connect it to the black lead of your multimeter. Gently probe the front of the crankshaft position sensor at PIN C or the yellow/black wire. You are looking for 12 volts DC here at this wire. Next check PIN B or the middle wire for ground by reversing the wires and checking the front of the brown/yellow wire. Never force the tip of your multimeter probe down into the slot of your connector. If you have power and ground at these two wires, and there’s no sign of any damage to your signal wire (PIN A – BLUE) then chances are you will need to replace your crankshaft position sensor. If your sensor is not working correctly, you will need to check the condition of your Honda Civic main relay. Where do I test my Civic ECU for CKF signal? If your crankshaft fluctuation sensor tests good and seems okay at the plug, the next step is to trace back the SIGNAL wires for your CKF sensor. These run connector C on your SOHC Honda ECU, or the 31 pin main plug located at the ECU harness. Check your passenger side kickpanel to trace back the wiring from the 31 pin connector. There are four signal wires you will want to check when your Honda Civic won’t start. These are listed below in the wiring schematic, and require you to test the continuity between the sensor side and your ECU. The four wires in question are highlighted, and broken out for you here;
Intermittent wiring issues can be frustrating, so be patient to locate your issue. Remember to check your wiring and the ECU wiring for any frayed wires or exposed wiring that may be subject to wire rot or damage. If you detect any suspicious sections of wiring, make sure to snip out carefully to remove and rewire. Always use same gauge and style of wire when replacing your damaged section of wiring harness in your Civic. To clear your P0335 trouble code, replace your crankshaft fluctuation sensor and use a scan tool to remove the code from your ECU. Have any questions about our How To Test a Honda Civic Crankshaft Position Sensor guide? Let us know below! What are the symptoms of a failing crankshaft position sensor?Symptoms of a Bad or Failing Crankshaft Position Sensor. Issues Starting the Vehicle.. Intermittent Stalling.. Check Engine Light Comes On.. Uneven Acceleration.. Engine Misfires or Vibrates.. Rough Idle and/or Vibrating Engine.. Reduced Gas Mileage.. What is a CKP sensor Honda?The crankshaft position sensor measures the rotation speed (RPMs) and the precise position of the engine crankshaft. Ford Crankshaft position sensor (CKP) Without a crankshaft position sensor the engine wouldn't start.
|

2000 honda civic crankshaft position sensor location
Related Posts


Copyright © 2024 toptenid.com Inc.