


Dead batteries are one of the most common vehicle problems. Although you learn basic car maintenance in drivers ed, jump starting a car is not something everyone learns how to do. Having the right emergency equipment is a great start, but you have to know how to use it. So, here is what you need to know about how to jump a car. Jumpstarting a
dead battery is something nearly every driver will have to do at least once. Before you can recharge and get going, here’s what you’ll need to jumpstart your car: Jumper cables Power source – either a portable jump battery (a jump box) or another vehicle Jumper cables are long, thickly insulated cables with toothy clips on one or both ends. The clips are distinguished by color, usually red
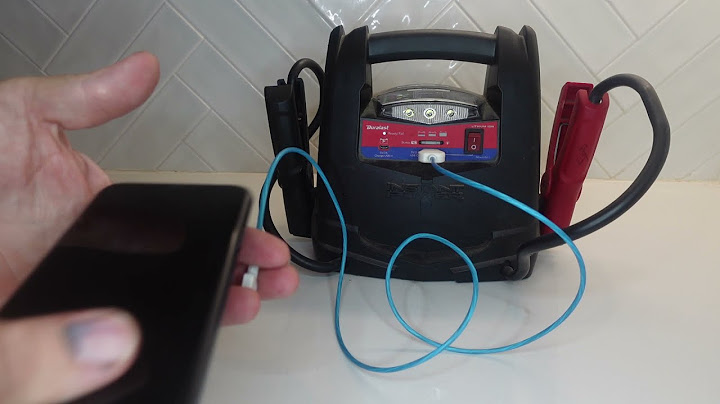
and black, to indicate positive and negative polarity. The red clip is positive. The black clip is negative. Jump boxes are portable batteries used to jumpstart a vehicle with special jump cables. These cables connect the jump battery directly to the dead car battery. Roadside assistance usually uses a jump box when helping stalled vehicles. Most people don’t keep a charged jump
box in their vehicle (although it’s highly recommended) so bringing a dead battery back to life usually requires jump starting it with another donor vehicle and a pair of jumper cables. It’s not too complicated, but you do need to know the steps to take and how to hook up the cables to ensure the safety of everyone and the vehicles. Here’s what to do! Before you do anything make sure that the battery giving the jump has enough voltage and is a matching voltage system type (12V, 6V, etc). If everything looks good, position the donor vehicle so that the vehicles are either nose-to-nose or side-by-side. The vehicles need to
be close enough to have the jumper cables reach each battery. Now do the following:
Step 2 - Attach the Jumper CablesWith everything in position it’s time to get the jumper cables in place and get your vehicle back up and running. Attaching the Clips: Attach the clips to the terminals in the following order:
Step 3 - Start the Donor VehicleNow that everything is hooked up it’s time to start up the donor vehicle so that it can supply power to the dead battery. Let the donor vehicle run for a few minutes. Step 4 - Test the Dead BatteryAfter a few minutes check one of the interior lights of the car being jumped. If it goes on, power is getting to the battery. Step 5 - Start the Dead CarStart up the car with the dead battery. Hopefully, everything goes as expected and the vehicle is drivable again. Step 6 - Unclip the Jumper CablesNow that the vehicle is running you can unclip the jumper cables in the reverse order that you connected them:
It’s best to allow the vehicle to run without stopping for at least 10-20 minutes to get the battery juiced back up. What If the Car Doesn’t Start After the Jumpstart?If the dead car doesn’t start after a few minutes of being charged then check the connections and try again. If the car does not start after several attempts, the battery may be too far gone to be jump started. What You Need to Know About Batteries to Jumpstart a CarCar batteries have two larger nubs, called terminals. There is a positive terminal and a negative terminal. Each should be clearly marked. Connecting cables to the right terminal is important to completing the circuit and giving power to the dead battery. Positive Terminal – The positive terminal is usually the bigger of the two terminals. It is marked with “POS” or “+”. It will connect to the positive clip on the jumper cable, which is usually red. Negative Terminal – The negative terminal on the battery is usually marked with “NEG” or “-“. This will attach to the other clip, which is usually black. As long as you’ve got that down and have a pair of jumper cables you should be able to get your battery back up and running. Important Jumpstarting Safety Tips
For more safe driving tips and defensive driving information, check out the idrivesafely.com blog! Jump starting a car is commonly done from another car, although it can be done from a jump battery. You will be connecting the two cars’ batteries with the jumper cables. Make sure cars are in the right distance to have the jumper cables reach each battery. Pull the cars so that they are either nose-to-nose aligned or side-by-side. Protect the donor batteryTo ensure that the car donating a charge (the donor car) is protected, take these precautions:
The order of the connection (red to dead, red to donor, black to dead, black to metal) reduces the chance of shorting the good battery. A quick test that there is enough voltage for the donor, be sure that the car giving he jump start’s headlights are steady and bright when the car is started. If the headlights dim, that can signal that the battery is low. *This article was updated on 9/22/2020 Which battery terminal do you connect first when jumping?Start by connecting the positive (often red) clamps of the jumper cables to the positive terminals of your battery. These are often marked, but they can be hard to see. Be sure to look closely to ensure that you are connecting to the right portion of the battery.
Which side of jumper cables go on first?Attach the red jumper cables first. Start by clamping one red cable to the positive side of the battery that won't start. Then attach the other red clamp to the positive side of the working battery. Next, clamp one black cable to the negative side of the working battery.
How do you jump a dead car battery with another car?Attach one of the red cables to the positive terminal on the dead battery. The terminal may say “POS” or “+” to help you identify it. Attach the other red cable to the positive terminal in the working car. While at the working car's battery, attach one of the black cables to the negative terminal.
Which jump lead do you disconnect first?In order to keep yourself safe and avoid any damage to your vehicle, you should disconnect the black clamp from the car being jumped, then the other black end from the 'good' car, then the red clamp from the 'good' car, and finally the last red clamp from the jumped car.
|

How to jump off a car battery


Copyright © 2024 toptenid.com Inc.